
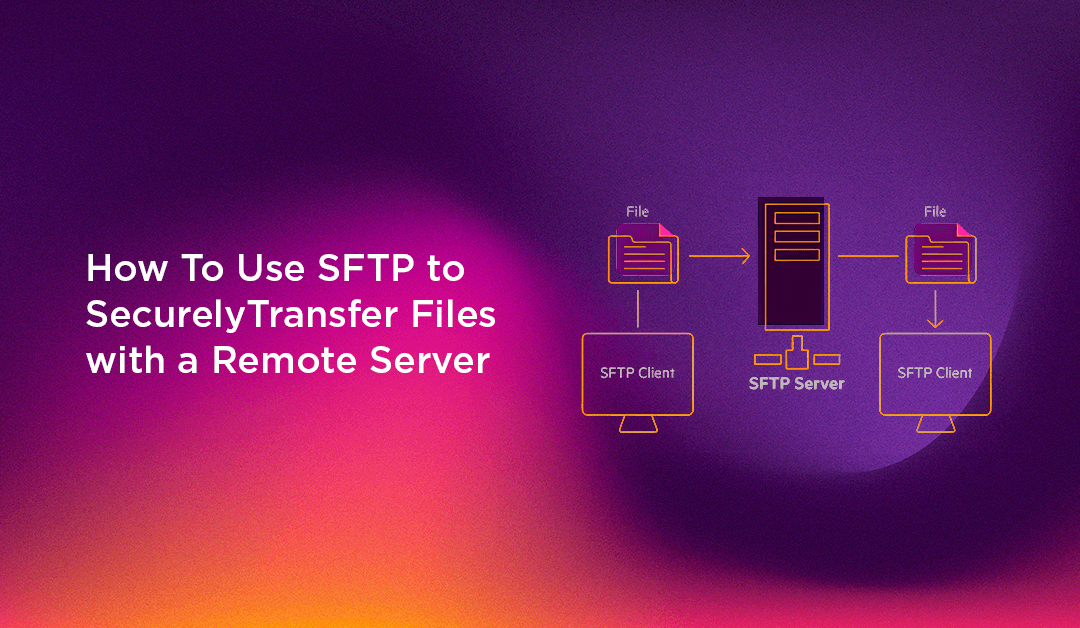
Learning how to use SFTP to transfer files securely is a foundational skill for any Linux server administrator, developer, or DevOps engineer. SFTP — the Secure File Transfer Protocol — provides an encrypted, reliable channel for moving files between your local machine and a remote server, leveraging the same SSH infrastructure you already rely on for remote access. Unlike legacy FTP, which transmits credentials and data in plain text, SFTP encrypts every byte of the connection, making it the industry-standard choice for secure remote file management in 2026.
In this complete guide, you will learn everything from basic SFTP connection commands and file navigation to advanced topics including SSH key authentication, chroot jail configuration for restricted users, graphical SFTP clients, shell scripting for automated transfers, bandwidth management, and fixing the most common SFTP errors. Whether you manage a single VPS or a fleet of production Linux servers, this guide will serve as your definitive SFTP reference.
What Is SFTP and How Does It Differ from FTP?
SFTP stands for SSH File Transfer Protocol. Despite the name similarity, it is not a secure wrapper around the classic FTP protocol — it is a completely separate protocol developed as an extension to SSH2. SFTP runs as a subsystem of SSH on port 22 by default, which means if you can SSH into a server, you can almost certainly use SFTP on it as well.
Here is why SFTP has replaced FTP in modern server environments:
- Full encryption: All data — including credentials, commands, and file contents — travels over an AES-encrypted SSH tunnel. With FTP, everything is transmitted in plain text, making it trivially easy to intercept with a packet sniffer.
- Single port: SFTP uses only TCP port 22, the same port as SSH. FTP requires separate control and data ports (21 plus a dynamic range), which complicates firewall rules significantly.
- Full file management: SFTP supports listing, renaming, deleting, moving, and changing permissions on remote files — not just copying them. SCP, another SSH-based transfer tool, can only copy files and has no interactive session.
- Authentication flexibility: SFTP inherits all SSH authentication mechanisms — password, SSH key pairs, and certificate-based authentication.
- Firewall-friendly: Because all SFTP traffic passes through a single well-known port, it works seamlessly with corporate firewalls and cloud security groups.
- Reliability: SFTP acknowledges each packet during transfer, making it more resilient to packet loss than SCP. This matters on high-latency or unstable connections.
Prerequisites
Before you begin, confirm you have the following in place:
- A Linux, macOS, or Windows (WSL or PowerShell with OpenSSH) terminal
- SSH access to the remote server — if SSH works, SFTP works on the same port and with the same credentials
- The remote server's IP address or hostname and a valid username
- OpenSSH client installed locally — it comes standard on Linux and macOS; on Debian/Ubuntu run
sudo apt install openssh-client
How to Connect to a Remote Server via SFTP
Starting an SFTP session uses the same syntax as the ssh command. The basic form is:
sftp username@remote_hostFor example, to connect as user john to a server at IP 203.0.113.50:
sftp john@203.0.113.50After you authenticate (with a password or SSH key), the prompt changes to:
Connected to 203.0.113.50.
sftp>
You are now in an interactive SFTP session. The remote server is your primary environment. Your local machine is accessible through commands prefixed with the letter l (for "local").
Connecting on a Non-Standard Port
If your server runs SSH on a port other than 22, use the -P flag (note: capital P, unlike ssh which uses lowercase -p):
sftp -P 2222 john@203.0.113.50Connecting with a Specific SSH Key
To specify a particular private key file for authentication:
sftp -i ~/.ssh/my_deploy_key john@203.0.113.50Verbose Mode for Debugging
To see detailed SSH handshake and authentication steps — useful when troubleshooting connection failures — add the -v flag:
sftp -v john@203.0.113.50Verbose output shows which authentication methods are attempted, which key files are loaded, and where the connection process fails. This is invaluable for diagnosing SSH key issues.
Getting Help Inside an SFTP Session
Once connected, type help or ? at the SFTP prompt to see all available commands with brief descriptions:
sftp> helpThis is your built-in quick reference — always available without leaving the session. To run a local shell command without exiting SFTP, prefix it with !:
sftp> !man sftp
sftp> !ls ~/downloads
The ! escape is one of the more useful but less-known SFTP features — it lets you check local disk space, compress a file, or look up a path without opening a second terminal window.
Navigating with SFTP
SFTP maintains two working directories simultaneously: one on the remote server and one on your local machine. Every navigation command has both a remote version and a local version (prefixed with l).
Checking Your Working Directories
sftp> pwd
Remote working directory: /home/john

sftp> lpwd
Local working directory: /home/localuser/projects
Listing Files and Directories
sftp> ls              # list remote files
sftp> ls -la          # detailed listing with hidden files and permissions
sftp> lls             # list local files
sftp> lls -la         # detailed local listing
Changing Directories
sftp> cd /var/www/html         # change remote directory
sftp> lcd ~/Desktop/uploads    # change local directory
Practical Navigation Tip
Before starting any transfer, run both pwd and lpwd to confirm you are in the correct directories on both ends. A misplaced file — especially in a web root — takes far longer to track down than the five seconds needed to verify your working directories.
Transferring Files with SFTP
Two commands handle the vast majority of file transfers: get (download from the remote server to your local machine) and put (upload from your local machine to the remote server).
Downloading Files from the Remote Server
Download a single file to your current local working directory:
sftp> get remote_file.txtDownload and save it with a different local name or to a specific path:
sftp> get remote_file.txt /local/path/custom_name.txtPreserve the original file's timestamps and permissions during download:
sftp> get -p remote_file.txtDownloading an Entire Directory
Use the -r (recursive) flag to download a directory and all its contents:
sftp> get -r remote_directory/For a full-fidelity recursive download that preserves both permissions and timestamps:
sftp> get -rp remote_directory/Uploading Files to the Remote Server
Upload a file to the current remote working directory:
sftp> put local_file.txtUpload to a specific remote path:
sftp> put local_file.txt /var/www/html/uploads/Preserve timestamps and permissions on upload:
sftp> put -p local_file.txtUploading an Entire Directory
sftp> put -r local_project_directory/Monitoring Transfer Progress
For large file transfers, SFTP displays a real-time progress bar showing bytes transferred, percentage complete, transfer speed, and estimated time remaining. If the progress display is missing, check whether your terminal emulator supports it — virtually all modern terminals do.
Managing Files and Directories via SFTP
Beyond file transfers, SFTP provides a comprehensive set of remote file management commands — all executed without needing to open a separate SSH session. This is what distinguishes SFTP from SCP.
Creating Directories
sftp> mkdir /var/www/new_project        # create remote directory
sftp> lmkdir ~/local_new_folder         # create local directory
Removing Files
sftp> rm old_file.txtImportant: SFTP does not ask for confirmation before deleting. There is no undo or recycle bin. Always double-check the path before running rm.
Removing Directories
sftp> rmdir empty_folderNote: rmdir only removes empty directories. To delete a directory with contents, you must remove files individually within SFTP, or use a regular SSH session with standard shell tools.
Renaming and Moving Files
sftp> rename old_name.txt new_name.txtThe rename command also works as a move — supply a different directory path to relocate the file:
sftp> rename /tmp/quarterly_report.pdf /home/john/documents/quarterly_report.pdfChanging File Permissions
sftp> chmod 644 index.html
sftp> chmod 755 /var/www/html/
Run ls -la after each chmod to verify the permission change took effect. SFTP uses the same octal notation as standard Unix chmod.
Changing File Ownership
sftp> chown 1001 file.txt     # change owner by UID
sftp> chgrp 33 file.txt       # change group by GID (33 is www-data on Debian/Ubuntu)
Note: SFTP's chown and chgrp commands require numeric UID/GID values, not usernames. Use id username in a regular SSH session to find the correct numeric ID for a user.
💡 None of these worked? Skip the guesswork.
Get Expert Help →Using SSH Keys for Passwordless SFTP Authentication
Password-based SFTP is convenient for ad-hoc access but exposes your server to brute-force and credential-stuffing attacks. SSH key authentication eliminates this risk and — once configured — is faster and more convenient because there are no password prompts to deal with.
Use the modern ED25519 algorithm, which offers better security and smaller key sizes than older RSA keys:
ssh-keygen -t ed25519 -C "sftp_access_myserver"Accept the default location (~/.ssh/id_ed25519) or specify a custom path. Add a strong passphrase for an additional security layer — a passphrase-protected key requires both the key file and the passphrase, even if the file is stolen.
ssh-copy-id -i ~/.ssh/id_ed25519.pub username@remote_hostThis appends your public key to ~/.ssh/authorized_keys on the remote server and sets the correct permissions automatically. If ssh-copy-id is unavailable, do it manually:
cat ~/.ssh/id_ed25519.pub | ssh username@remote_host "mkdir -p ~/.ssh && chmod 700 ~/.ssh && cat >> ~/.ssh/authorized_keys && chmod 600 ~/.ssh/authorized_keys"sftp -i ~/.ssh/id_ed25519 username@remote_hostYou should connect without being prompted for a password (only a passphrase prompt if you set one for the key itself).
Add an entry to ~/.ssh/config on your local machine to save having to type the full connection details every time:
Host myserver
    HostName 203.0.113.50
    User john
    IdentityFile ~/.ssh/id_ed25519
    Port 22
Now you can connect with just:
sftp myserversudo adduser sftpuser --shell /usr/sbin/nologinThe /usr/sbin/nologin shell prevents the user from opening an interactive SSH session while still allowing SFTP access. On some systems, use /bin/false instead.
sudo mkdir -p /var/sftp/uploads
sudo chown root:root /var/sftp
sudo chmod 755 /var/sftp
sudo chown sftpuser:sftpuser /var/sftp/uploads
Critical rule: The chroot directory (/var/sftp) must be owned by root and must not be writable by the SFTP user or any group they belong to. OpenSSH enforces this requirement strictly and will reject connections with a "bad ownership or modes for ChrootDirectory" error if it is not met. The user-owned subdirectory (/var/sftp/uploads) is where the user can actually read and write files.
Open /etc/ssh/sshd_config and add this block at the end of the file:
Match User sftpuser
    ChrootDirectory /var/sftp
    ForceCommand internal-sftp
    AllowTcpForwarding no
    X11Forwarding no
What each directive does:
ChrootDirectory /var/sftp— jails the user inside/var/sftp. From their perspective, this directory is the root of the entire filesystem.ForceCommand internal-sftp— forces use of the built-in SFTP subsystem and prevents any shell access, even if the user somehow has a valid shell set.AllowTcpForwarding no— prevents the user from creating SSH tunnels through the server.X11Forwarding no— disables X11 graphical forwarding for this user.
sudo systemctl restart sshdsftp sftpuser@your_server_ipThe user should connect and see only the contents of /var/sftp. Attempting to navigate to ../../etc or any other path outside the jail should return "Permission denied" — that is the intended behaviour.
Scaling to multiple users: To apply the same restrictions to a group of users, replace Match User sftpuser with Match Group sftponly and add all restricted users to that group with sudo usermod -aG sftponly username. Give each user their own subdirectory under the chroot root.
Configuring secure, isolated SFTP environments — including SSH key management, chroot setup, and ongoing access audits — is part of what our Linux server management service delivers for clients running web applications and hosting environments.
Automating SFTP Transfers with Shell Scripts
Interactive SFTP is ideal for one-off tasks, but production environments typically need automated, scheduled transfers — for nightly database backups, deployment pipelines, or data feeds. SFTP supports batch mode for non-interactive scripted operations.
Using an SFTP Batch File
Create a plain text file containing your SFTP commands, one per line:
# sftp_deploy.txt
cd /var/www/html
put /local/release/index.html
put /local/release/app.js
put -r /local/release/assets/
bye
Execute it in batch mode using the -b flag:
sftp -b sftp_deploy.txt username@remote_hostSFTP reads and executes commands from the file sequentially, then exits when it reaches bye or the end of the file. The -b flag also causes SFTP to abort immediately on any error, preventing partial transfers from going undetected.
Automated Daily Backup Script with SSH Keys
This example dumps a MySQL database, compresses it, and uploads it to a remote backup server — all without any manual interaction:
#!/bin/bash
DATE=$(date +%Y-%m-%d)
BACKUP_FILE="/var/backups/db_${DATE}.sql.gz"

# Dump and compress the database
mysqldump -u root mydb | gzip > "${BACKUP_FILE}"

# Transfer to remote backup server via SFTP
sftp -i /root/.ssh/backup_key -b - backup@203.0.113.100 << EOF
cd /backups/daily/
put ${BACKUP_FILE}
bye
EOF

echo "[$(date)] Backup uploaded: ${BACKUP_FILE}"
Schedule it to run at 2 AM daily with cron:
crontab -e
# Add this line:
0 2 * * * /usr/local/bin/sftp_backup.sh >> /var/log/sftp_backup.log 2>&1
SFTP Performance Tips: Bandwidth Throttling and Large File Handling
Limiting Bandwidth Usage
When transferring large files on a production server, uncapped SFTP transfers can saturate the network connection and degrade other services. The -l flag caps bandwidth in kilobits per second:
sftp -l 8192 username@remote_host # limit to 8 MbpsThis is particularly useful for scheduled overnight backups where you want to leave headroom for other traffic.
Enabling SSH Compression
For text-heavy files such as source code, logs, and SQL dumps, SSH-level compression reduces transfer time and bandwidth usage:
sftp -C username@remote_hostDo not use compression for already-compressed files (.gz, .zip, .mp4) — the overhead of compressing incompressible data slows the transfer without reducing the file size.
Handling Large Files and Resuming Interrupted Transfers
SFTP does not natively support resuming a partially completed transfer. For large files, consider these alternatives:
- rsync over SSH — the best solution for resumable transfers. The
--partialflag retains partially downloaded files and--append-verifyresumes from where the transfer stopped:
rsync --partial --progress --append-verify -e ssh large_file.iso username@remote_host:/path/- Split large files before transfer — split into manageable chunks, transfer each, then reassemble:
# Split a large database dump into 1 GB chunks
split -b 1G large_database.sql.gz db_chunk_

# Upload all chunks via SFTP
sftp> put db_chunk_*

# Reassemble on the remote server (run via SSH)
cat db_chunk_* > large_database.sql.gz
rm db_chunk_*
SFTP on Different Linux Distributions
SFTP is included with the OpenSSH package — the same package that provides the ssh and sshd commands. Here is how to install and enable it on each major Linux distribution:
Ubuntu and Debian
sudo apt update
sudo apt install openssh-client openssh-server
sudo systemctl enable --now ssh
CentOS, RHEL, AlmaLinux, and Rocky Linux
sudo dnf install openssh-clients openssh-server
sudo systemctl enable --now sshd
Fedora
sudo dnf install openssh
sudo systemctl enable --now sshd
Arch Linux and Manjaro
sudo pacman -S openssh
sudo systemctl enable --now sshd
Common SFTP Errors and How to Fix Them
Even experienced administrators encounter SFTP errors. Here are the most frequent problems along with their root causes and solutions.
Permission Denied on Upload
Cause: The remote directory does not permit write access for your user.
Fix: Via an SSH session, check the directory ownership and permissions and correct them:
ls -la /path/to/remote/dir
sudo chown username:username /path/to/remote/dir
sudo chmod 755 /path/to/remote/dir
Connection Refused on Port 22
Cause: The SSH daemon is not running, or a firewall is blocking port 22.
Fix: Check the SSH service status and firewall rules:
sudo systemctl status sshd
sudo systemctl start sshd

# ufw (Debian/Ubuntu)
sudo ufw allow 22/tcp

# firewalld (RHEL/CentOS/Fedora)
sudo firewall-cmd --permanent --add-service=ssh
sudo firewall-cmd --reload
Host Key Verification Failed
Cause: The server's SSH fingerprint changed — normal after a reinstall or IP reuse, but could also indicate a man-in-the-middle attack. SSH refuses to connect to protect you.
Fix: Remove the outdated entry from your known_hosts file. Always verify the new fingerprint through a trusted out-of-band channel before accepting it:
ssh-keygen -R 203.0.113.50Then reconnect and confirm the new fingerprint matches what your hosting provider shows.
Broken Pipe During a Long Transfer
Cause: The SSH connection timed out due to an idle period during a slow large-file upload.
Fix: Configure SSH keepalives in ~/.ssh/config on your local machine:
Host *
    ServerAliveInterval 60
    ServerAliveCountMax 5
This sends a keepalive packet every 60 seconds and allows up to 5 missed responses before dropping the connection.
Permission Denied (publickey) with SSH Key Authentication
Cause: Incorrect file permissions on ~/.ssh or ~/.ssh/authorized_keys on the remote server. SSH is strict about key file security and will silently reject keys if permissions are too open.
Fix:
chmod 700 ~/.ssh
chmod 600 ~/.ssh/authorized_keys
chown -R username:username ~/.ssh
sftp: Command Not Found
Cause: The OpenSSH client package is not installed on your local machine.
Fix:
sudo apt install openssh-client     # Debian/Ubuntu
sudo dnf install openssh-clients    # RHEL/CentOS/Fedora
Bad Ownership or Modes for ChrootDirectory
Cause: The chroot directory is not owned by root or is group/world-writable — the most common mistake when configuring SFTP chroot jails.
Fix:
sudo chown root:root /var/sftp
sudo chmod 755 /var/sftp
After fixing, restart SSH with sudo systemctl restart sshd and test the connection again.
SFTP vs SCP vs FTP vs rsync: Which Protocol Should You Use?
Choosing the right file transfer protocol depends on your specific use case, security requirements, and the environment you are working in.
- FTP: Completely unencrypted — credentials and data travel in plain text. Only use this in isolated legacy environments where encryption is impossible. Never use FTP over the public internet.
- FTPS: FTP with TLS encryption added. More secure than FTP but requires multiple ports (separate control and data connections), which complicates firewall rules significantly. Choose this only when a legacy system requires FTP compatibility with encryption.
- SCP: Fast and simple — designed for one-shot file copies over SSH. Excellent for scripting single transfers where you do not need an interactive session or file management. Note that SCP is being deprecated in some newer Linux distributions in favour of SFTP. If your scripts use SCP, consider migrating them to SFTP batch mode.
- SFTP: The recommended default for virtually all server file transfer scenarios. Encrypted, interactive, full file management, single firewall port, widely supported by clients and automation tools. Default to SFTP unless you have a specific reason not to.
- rsync over SSH: Best for incremental syncs, backups, and large datasets. rsync only transfers changed blocks (delta sync), saving significant bandwidth on repeat runs. It also supports resuming interrupted transfers. Use rsync when you need efficient bidirectional synchronisation rather than simple one-off transfers.
As of 2026, SFTP is the industry-standard secure file transfer protocol for Linux server management. The only common reasons to choose differently are: SCP for speed-critical scripting of simple copies, or rsync for delta synchronisation and backup workflows.
Conclusion
SFTP is one of those tools that rewards investment — the more deeply you learn it, the more capability you unlock. Start with the basics: connect, navigate with dual local/remote commands, then upload and download files. Layer in SSH key authentication to eliminate password dependencies. Add chroot jail configuration when you need to grant external users isolated access. Finally, automate repetitive transfers with batch scripts and cron to eliminate manual work entirely.
The combination of strong encryption, flexible authentication, comprehensive file management, and scriptability makes SFTP the right choice for almost every server file transfer scenario — from pushing a single config file to running nightly backup pipelines to providing clients with isolated, jailed upload portals.
If your team needs expert help setting up and hardening SFTP access on your Linux servers — including SSH key management, chroot configuration, automation scripting, and ongoing access audits — CloudHouse Technologies' Linux server management team is here to help you do it right.